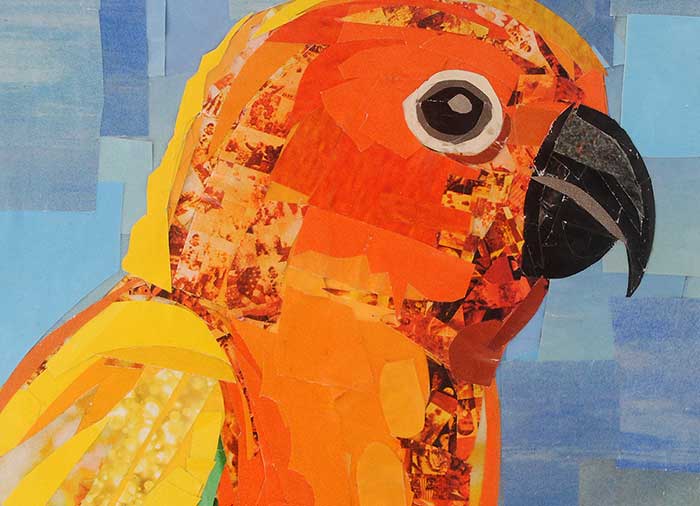
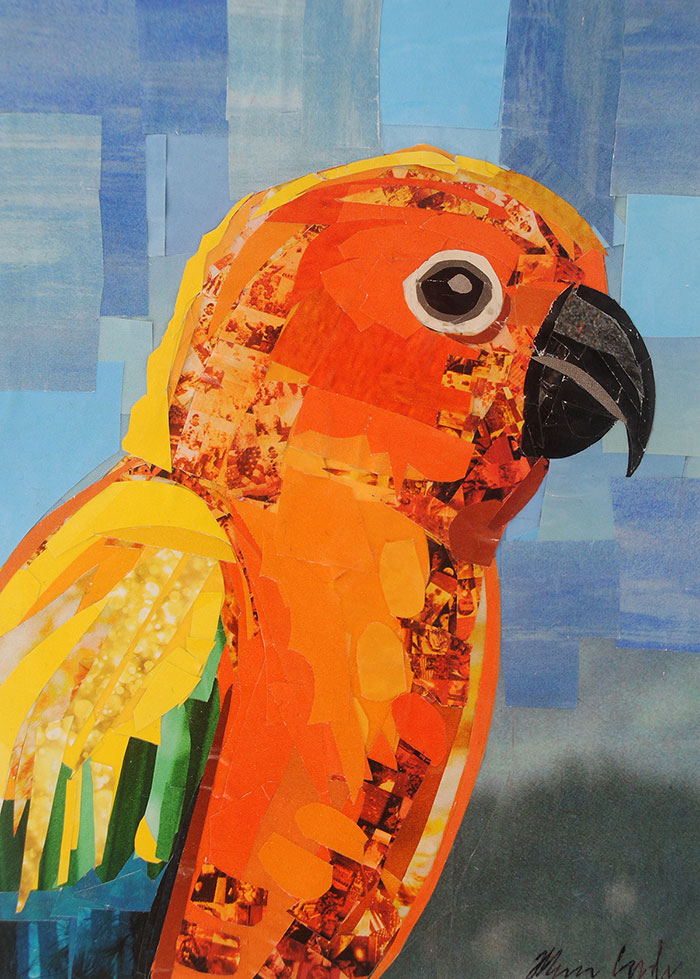
“Orange Conure,” Collage on paper, 7″x5″ Order a print
This was my first time tackling a conure collage (although I shared the second one I completed first). This was yet another piece I worked on while live streaming, and it was a challenge to juggle working on the piece while answering questions about my work. This took a tad longer than I expected since I kept reworking sections of the conure’s body. I wanted to get a good balance of solid colors and textures.
This piece was also the first of two conure collages that I completed this month.
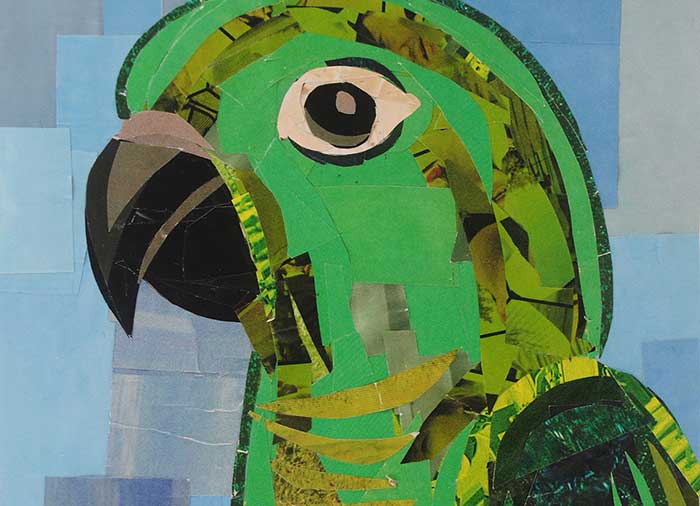
“Conor the Green Conure,” Collage on paper, 7″x5″ Order a print
I couldn’t help myself with giving this piece an amusing name. This was yet another collage that I made while live streaming my process. This one was a bit easier to put together than the first conure collage that I made, and I enjoyed mixing in quite a few textures. This piece has fragments of pictures of grass as well as green tinted photographs from ads and some other interesting green patterns I pulled from magazine ads.
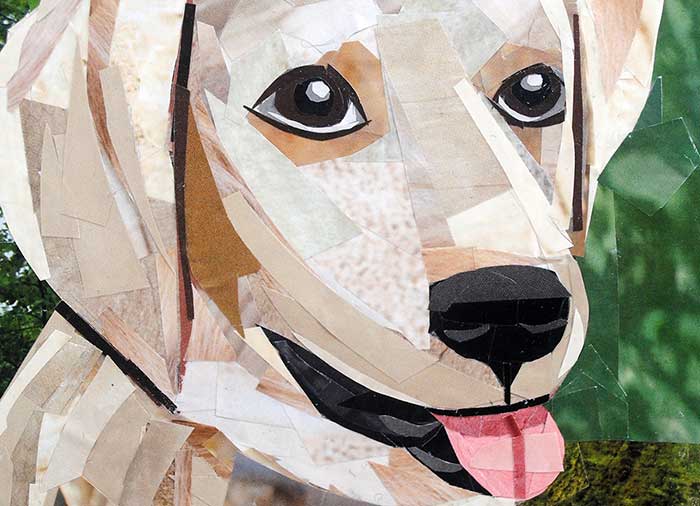
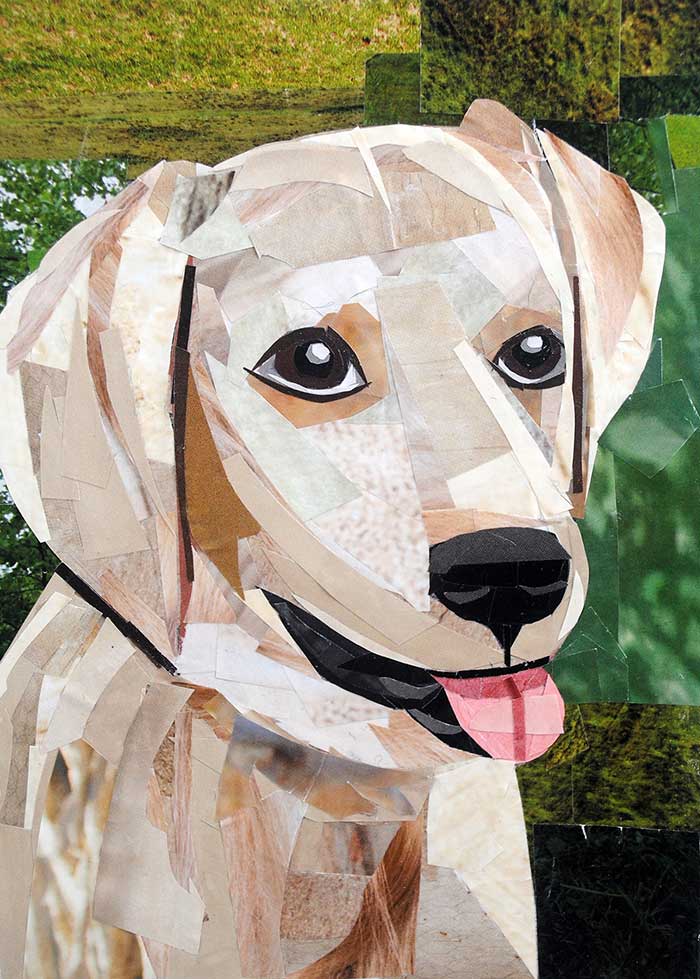
“Bark Wahlberg the Golden Retriever,” Collage on paper, 7″x5″ Order a print
This was the last collage I completed in 2020. It was also the first collage I’ve ever worked on while live streaming my process. I was nervous about live streaming at first, however, I’ve gotten used to it and actually like it a lot. It’s a wonderful way to work on my artwork and have some company at the same time. Especially these days when we’re all cooped up, it’s a wonderful way to connect with my followers and other artists.
Lately I’ve been live streaming from time to time on TikTok. I’m planning to start live streaming on Instagram as well, but I’ll work on a schedule to make it easier for my followers to know when that will happen. I suppose at the moment I like how I can hop on and live stream on a whim when it comes to TikTok.
“The Happy Bernedoodle,” Collage on paper, 7″x5″ Order a print
This piece was the second one of two commissioned pet portraits of bernedoodles that I completed recently – and this one was of a dog named Ace. This piece was a lot easier to tackle than the other one, but that may have been because I was feeling a little rusty with dog portraits until after I completed the portrait of Addi. Ace’s sketch was also much closer to the composition of the final portrait, which also helped a great deal. I especially enjoyed working on Ace’s portrait since he looks so happy, it’s hard not to smile when you see an upbeat expression like that.
If you’r interested in purchasing my custom art, you can learn more about the commission process here.
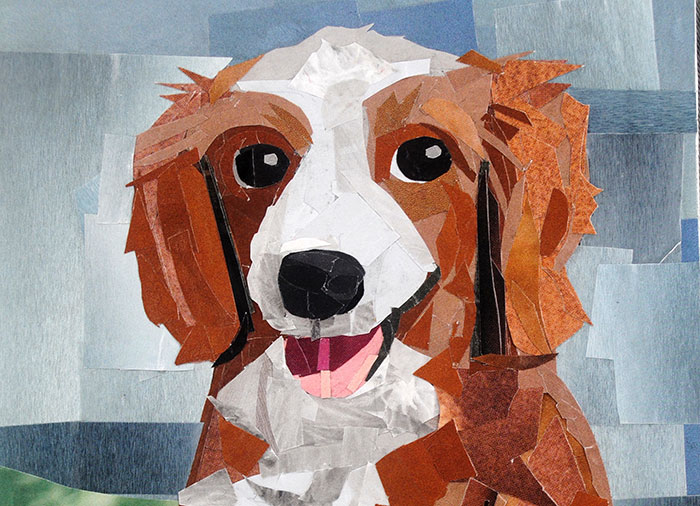
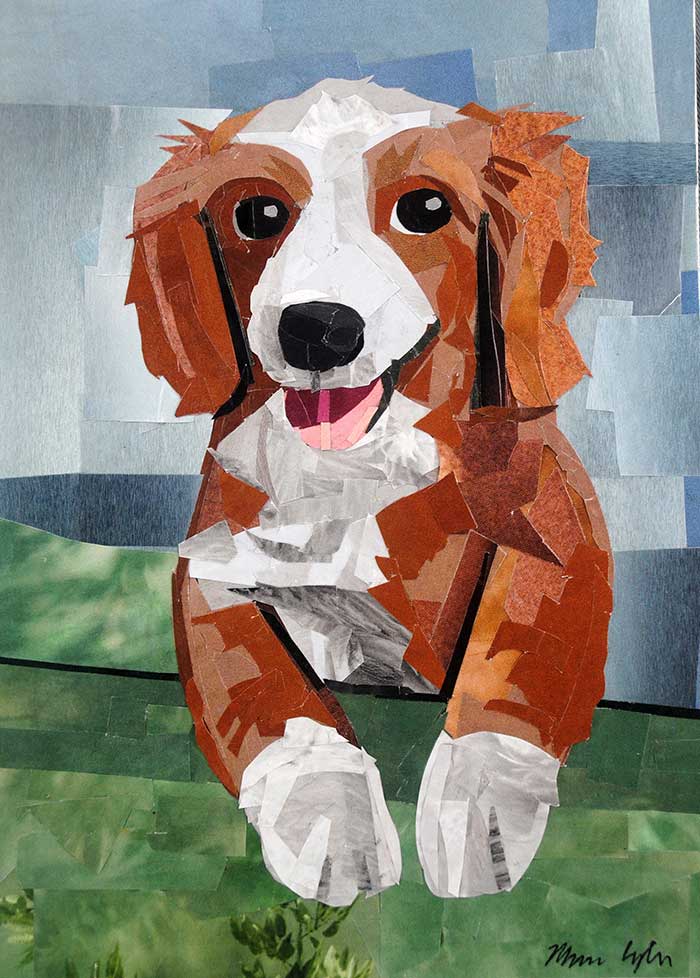
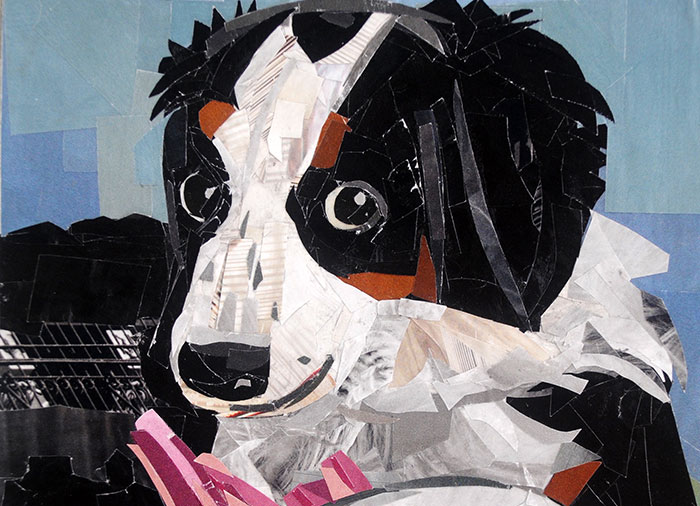
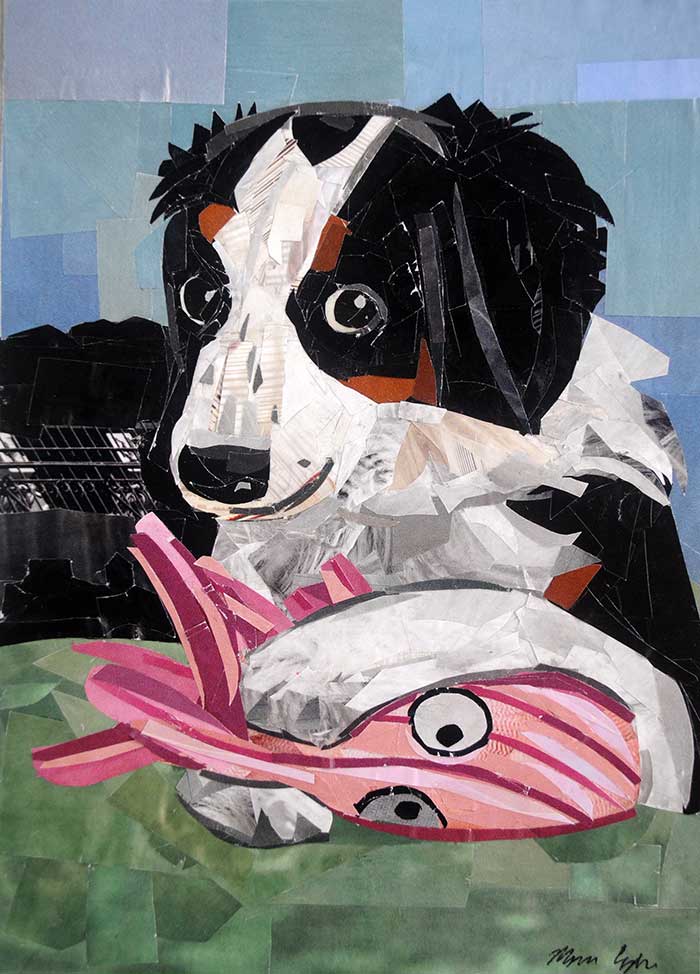
“The Playful Bernedoodle,” Collage on paper, 7″x5″ Order a print
This piece was one of two commissioned pet portraits of bernedoodles that I completed recently – and this one was of a dog named Addi. I had a lot of fun tackling this portrait, and a big part of that was how expressive Addi was in all of the reference photos that I was provided. I initially struggled with this collage since my sketch wasn’t well thought out. I didn’t include the octopus toy in the sketch, and Addi’s paws were posed differently. As a result, I ended up having to rework her paws. I also realized that the shape of her head wasn’t sketched out proportionally, so again I had to work on reshaping that section. This portrait was a good reminder that initial sketches are so helpful for planning a piece, and taking more time in the beginning to get the sketch down right, will save you a lot of time later down the line.
If you’r interested in purchasing my custom art, you can learn more about the commission process here.
A couple of years ago I gave a talk at a Meetup for coders and artists. During the day I code, while I work on my art in my free time, so I was excited to speak at an event that involved the merging of my two interests.
Over the years, as I’ve learned more about technology and marketing, I’ve made adjustments to my artist website. Take a look at my talk to learn more:
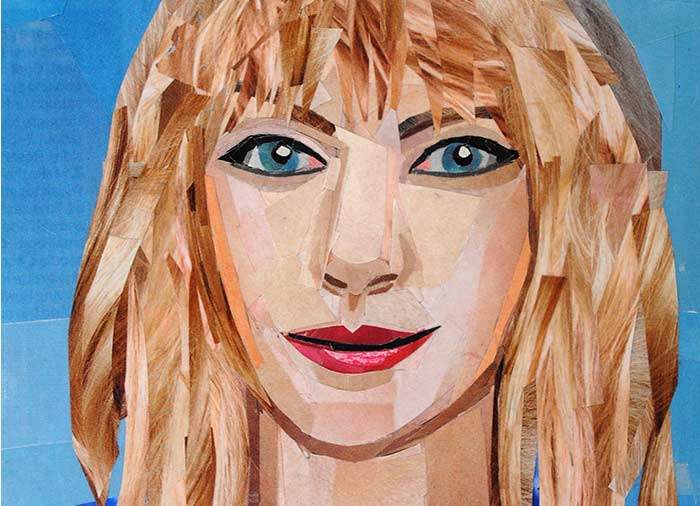
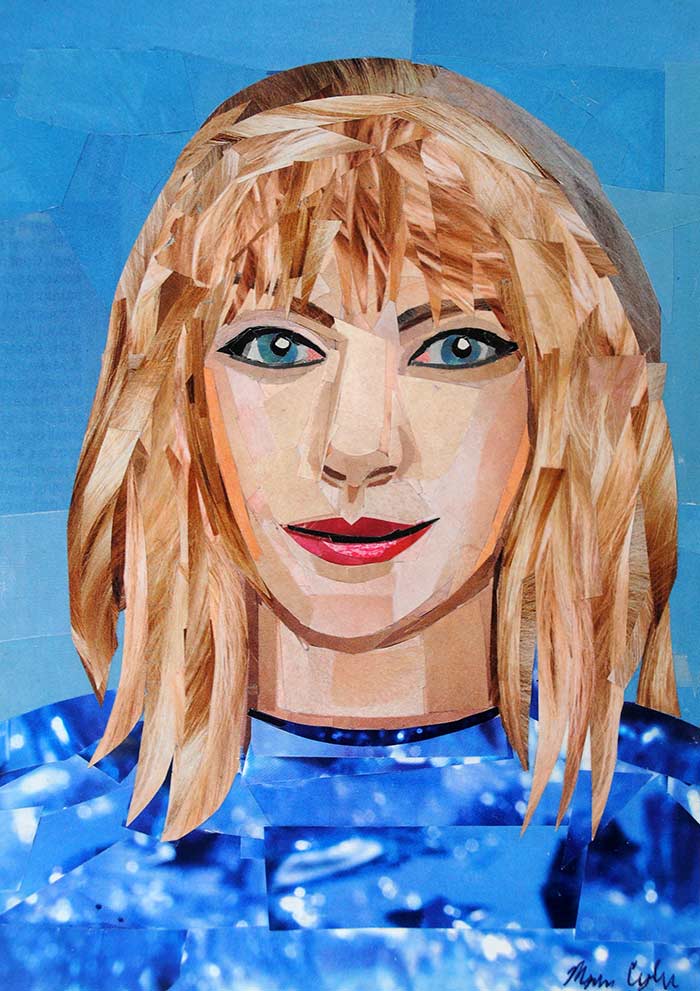
“Taylor Swift” Collage on paper. 7″x5″ Order a print
The other day I completed a portrait of Ruth Bader Ginsburg, which inspired me to start working on portraits again. Previously, I hadn’t focused much on portraits. My first few solo shows consisted of bodies of work that were entirely made up of portraiture/figurative pieces, and I burned myself out on that subject matter. I haven’t revisited portraiture much other than when I’m commissioned to make a portrait for a client, and I thought it would be great to delve back into the subject matter that I haven’t really focused on in years.
This portrait of “Taylor Swift” took more time than my pieces generally take, since I’m rusty with the human form and I wanted to get her likeness down properly. I’m excited to continue working on portraits and see how much I can improve with the process.
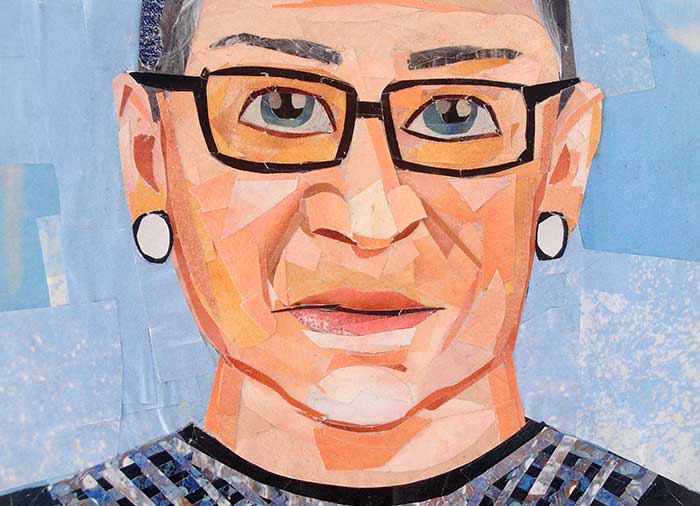
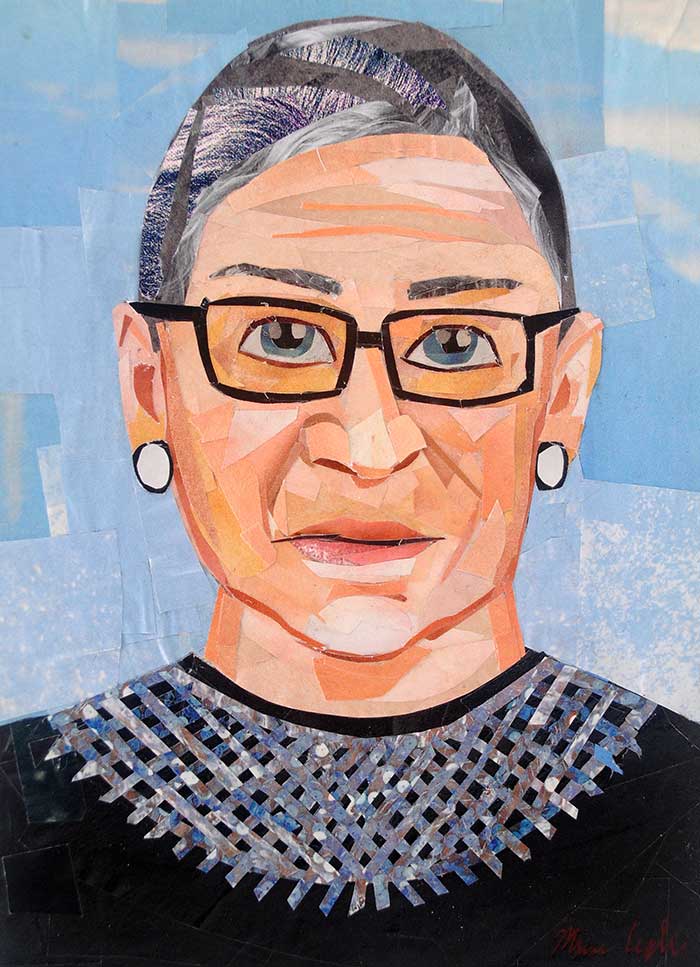
“Ruth Bader Ginsburg” Collage on paper. 7″x5″ Order a print
When Ruth Bader Ginsburg passed away the other day, I was inspired to work on a portrait to honor her memory. I haven’t tackled a portrait in nearly three years, so I felt rusty when I started this one. The tricky/intimidating thing about portraiture is getting the likeness of a person down properly. Sometimes I’ve struggled with it quite a bit, and this piece was no exception. It took me about a week to work on layering everything until I felt it was complete.
I think this portrait has inspired me to work on portraiture once again. Since it takes me longer to make these since I am a little rusty, I don’t plan to film any time lapse videos for my next few pieces. Once I’m able to speed up the process, I’ll consider filming my process again.
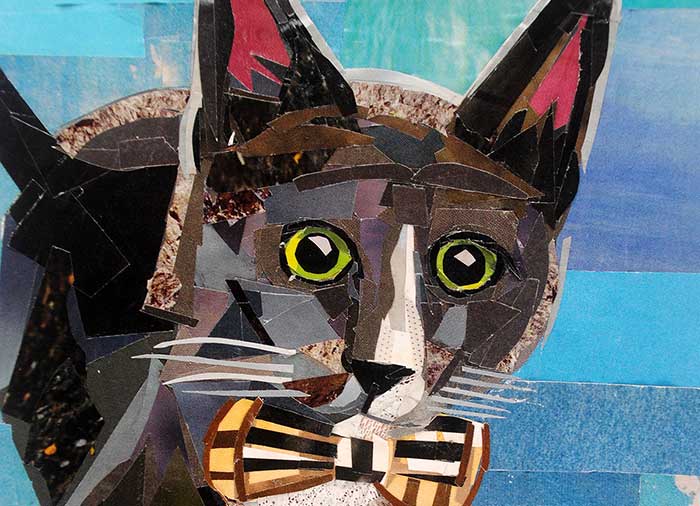
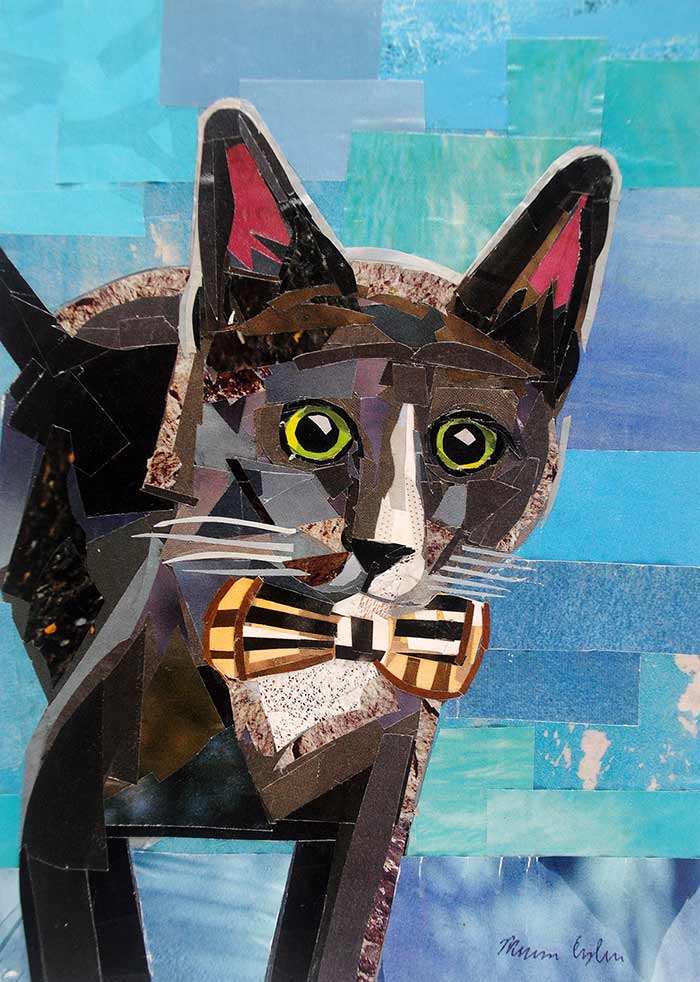
“Franklin the Cat” Collage on paper. 7″x5″ Order a print
Earlier this year I got to work on a cat portrait for a commission. I had a lot of fun tackling this portrait, specifically because one of the reference photos had the cat wearing a cute, striped bowtie. The client was also wonderful to work with.
Over the years I’ve made a number of cat portraits, but usually the custom art orders I receive are dog portraits. It was fun working on something a bit different as far as my custom artwork goes.
I get a lot of my inspiration from everyday life. My portraits are inspired by people I know or familiar figures, while my landscape/cityscape collages are usually based on the sights I see when traveling around a new city or exploring a place that I’m familiar with. My still life pieces are influenced by common, everyday objects, while my animal portraits are usually inspired by my visits to the zoo or whenever I encounter wildlife on my travels.
Aside from finding inspiration from the world around me, I also like to get inspired by seeing what other artists are making. I draw inspiration from art museum/gallery exhibits, as well as by connecting with fellow artists online. Seeing what other creatives are making is a great way to tap into your own creativity.
Other times the materials I work with prove to be very inspiring. Sometimes when I’m paging through a magazine, I’ll find a pattern or fragment within a photograph that sparks interest in using a specific color palette or tackling a specific subject. Usually when I’m working on a work in progress, I find paging through magazines to be especially inspiring, since I never know what colors and patterns I’ll find. There’s always an element of surprise that makes the entire process exciting.