Here is a step-by-step overview of Megan Coyle’s “painting with paper” collage process. The progress pictures below are of her “Chow Time” collage.
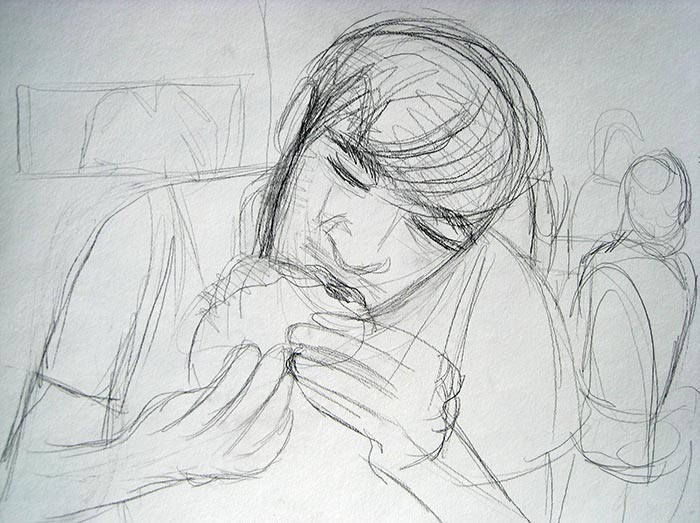
1) Each collage begins with a sketch. Depending on the subject matter, the sketch may be a rough sketch or a more detailed one. If you take a look at the sketch above, you’ll notice that it looks a lot different than the finished collage that appears that the bottom of this page. In this case, Coyle used a rough sketch to give her an idea of the composition.
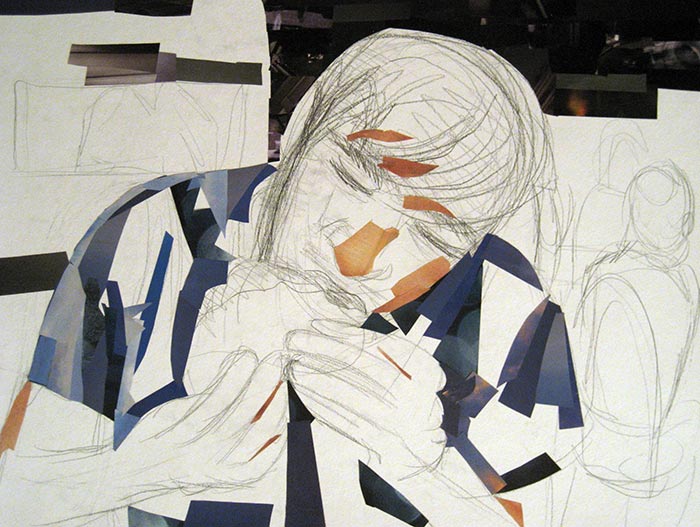
2) Next Coyle pages through magazines, looking for specific colors and different textures. She cuts out different shapes of color depending on the shape of the highlights and shadows she wants to include in the collage. Then she glues down the different pieces of paper on top of the drawing. She uses a glue stick so she can easily go back in and move the pieces around before the artwork is complete.
3) She usually moves back and forth with gluing down pieces of paper in the background and foreground. She blocks in the color first and then works on adding in more detail with smaller strips of paper, shaping the figure as she goes along.
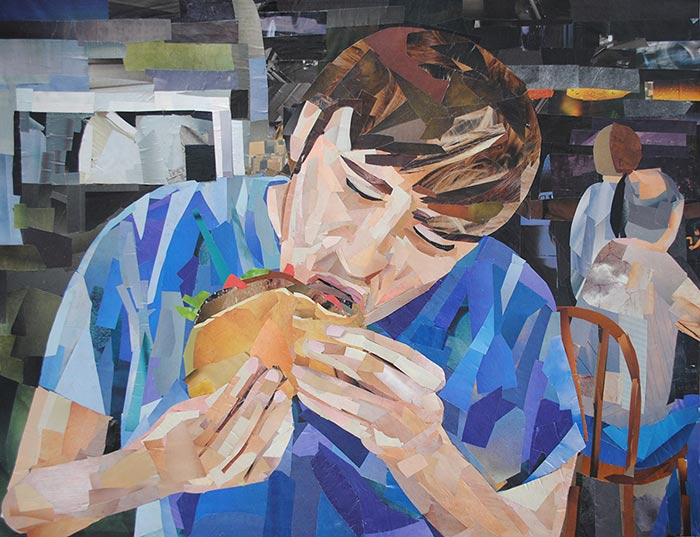
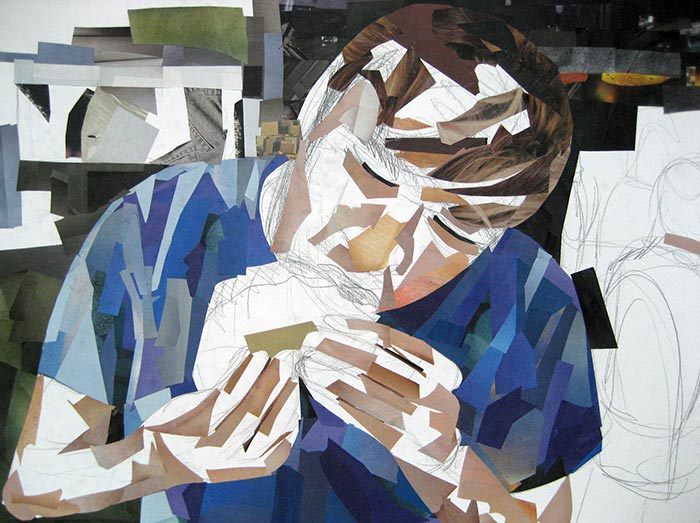
4) After layering different shapes of color and texture, she gradually covers the entire page until the work of art is complete. Then she paints on a couple coats of UV protective varnish to help keep the pieces of paper in place and protect the artwork from sunlight.