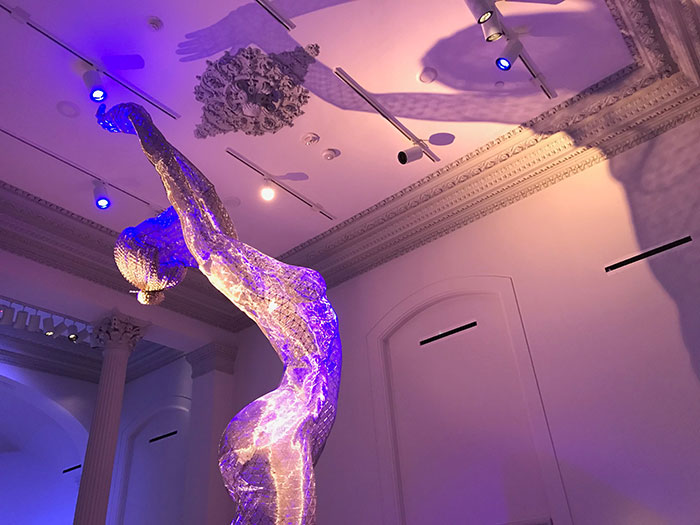
Last weekend I stopped by the Renwick’s No Spectators: The Art of Burning Man. Since the exhibit opened earlier in the month, it wasn’t that crowded which was nice. Overall, I thought the exhibition was beautiful, filled with magnificent and large installations. Pictured above is Marco Cochrane’s Truth is Beauty, a beautiful, large sculpture.

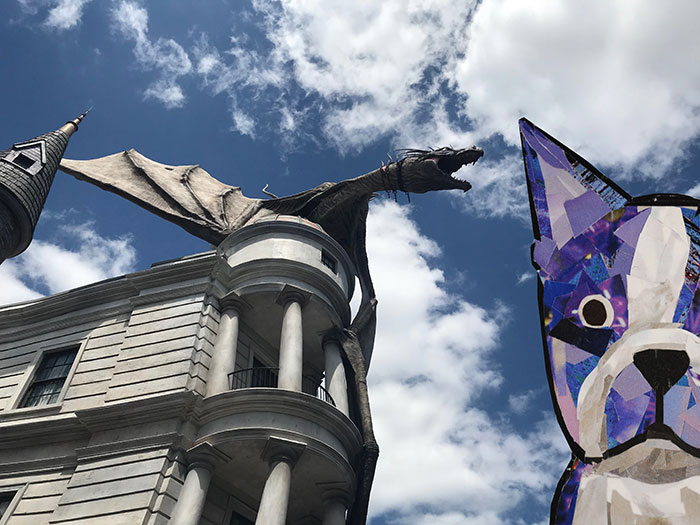
Duane Flatmo’s Tin Pan Dragon was pretty fascinating. The artist used odds and ends to fashion together a dragon. From the picture above, you can make out a muffin tin used to construct part of the dragon’s face.
I was a little in awe when I saw David Best’s Temple. The intricate patterns of the wood that lined the walls and ceiling, were beautiful.

Here you can get a sense of the layout of the room.
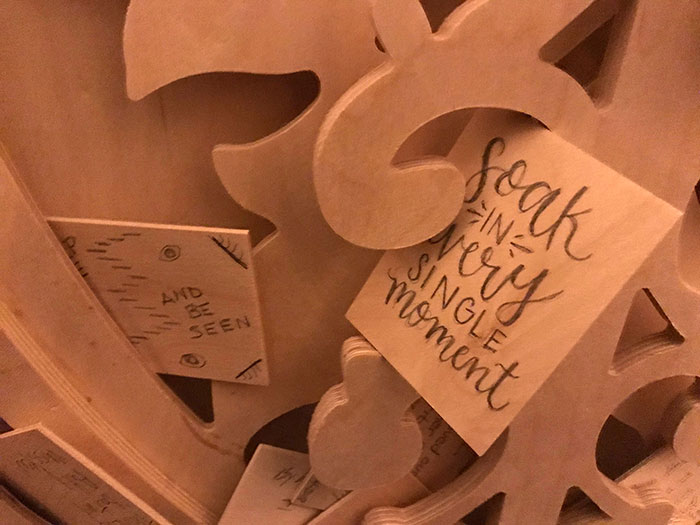
Along the walls were bits of rectangular shaped pieces of wood that visitors wrote on and left wedged into the installation. I especially liked the message, “Soak in every single moment,” that a visitor had left behind.
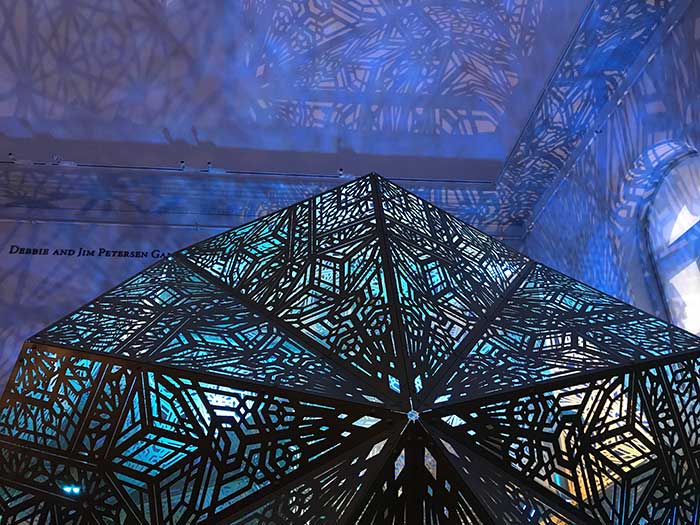
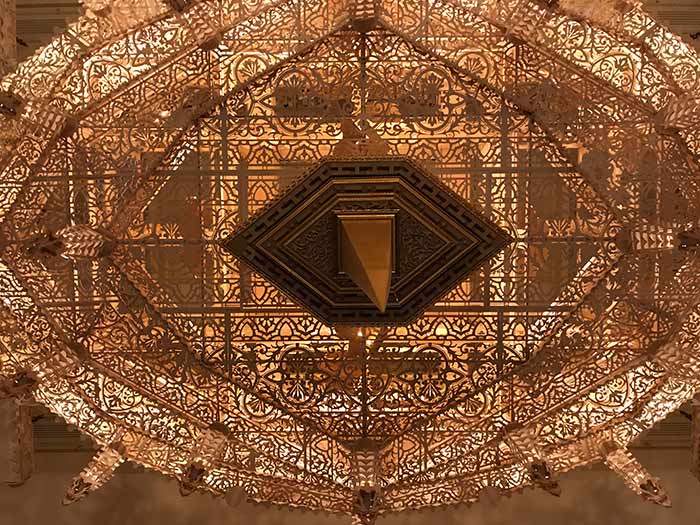
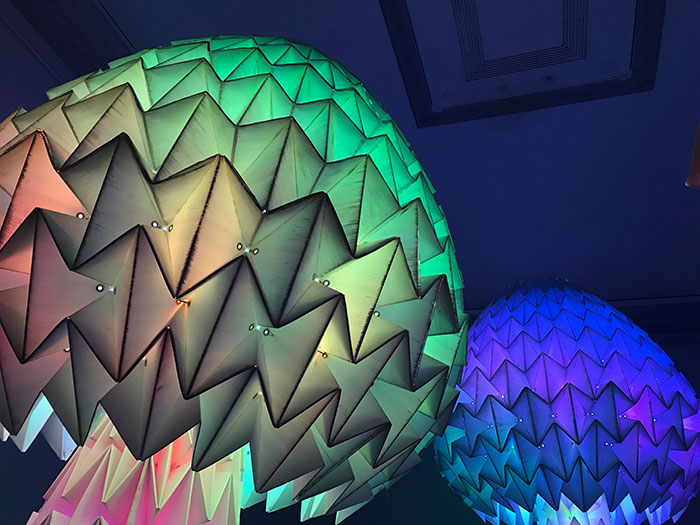
One room contained large constructions of different shapes with intricate patterns cut out of them, with light shining through. Yelena Filipchuk and Serge Beaulieu’s work was definitely one of my favorites of the show.
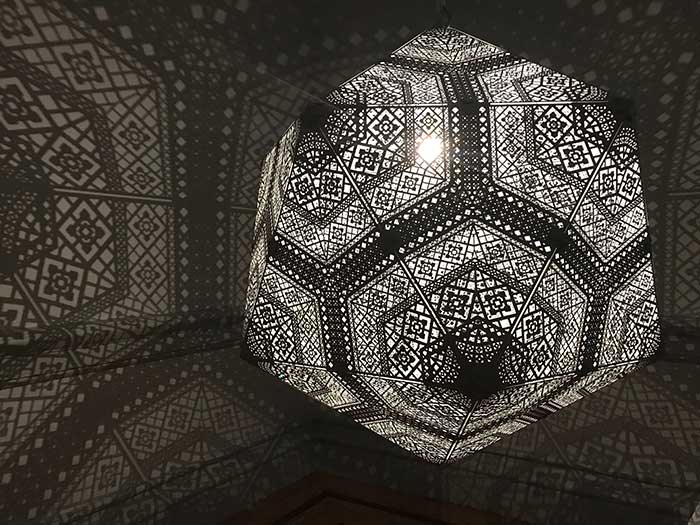
I liked how the lights cast shadows that extended the patterns of the different objects.
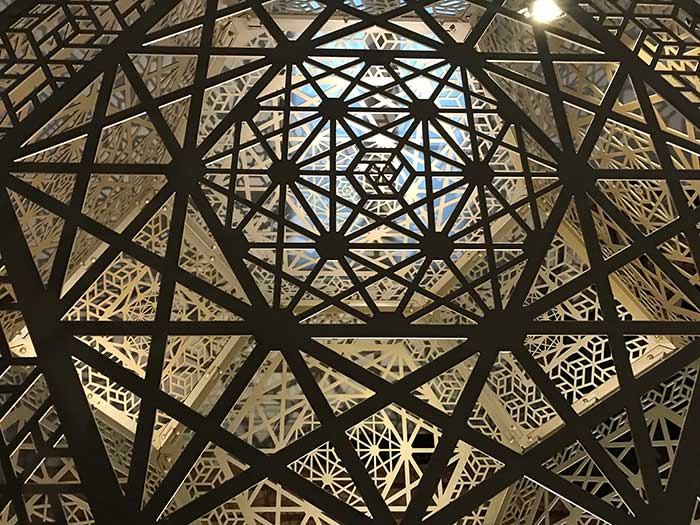
A couple of them used regular light, while the largest shape had a light that changed color every few seconds.
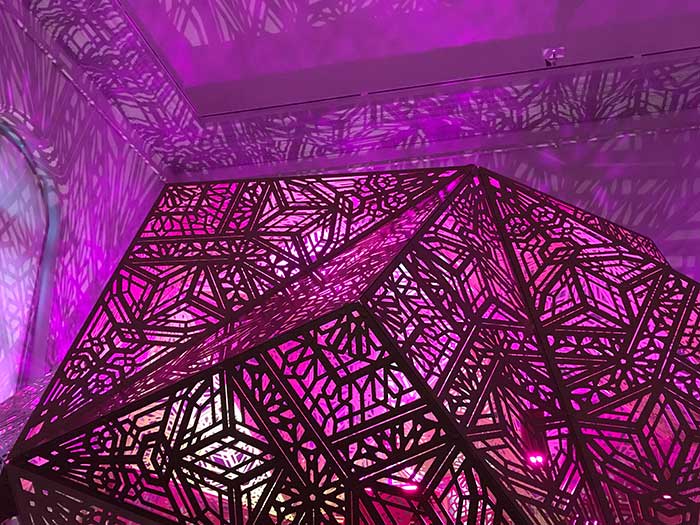
Above is an image of the object with the changing light.
Another one of my favorites were the FoldHaus Art Collective’s Shrumen Lumen, which consisted of large mushroom-shaped sculptures with lights that changed colors after every few minutes.

Above is a close-up of the mushroom sculptures.
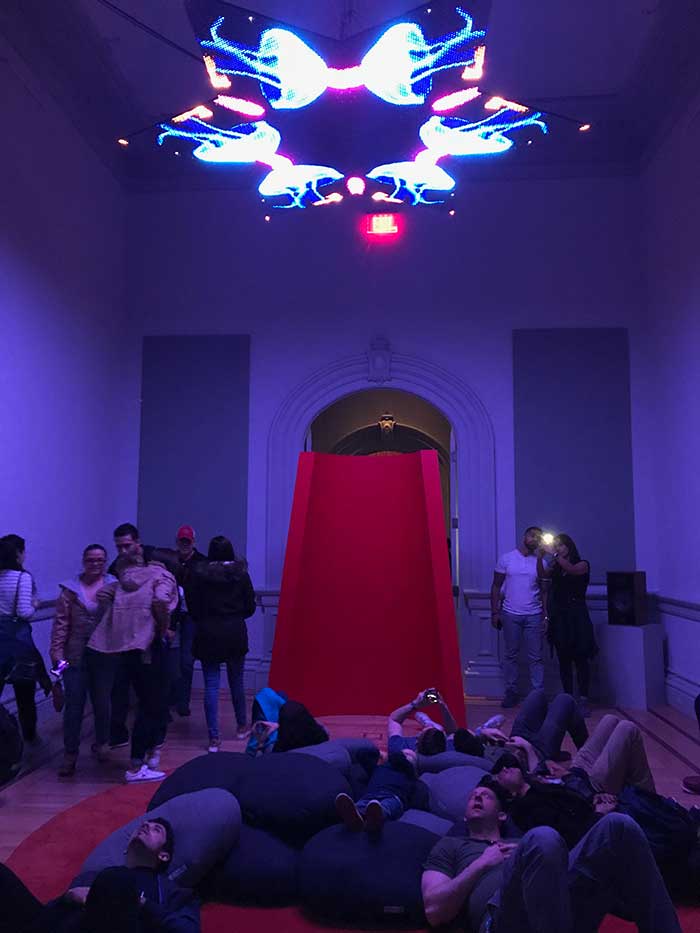
I thought Christopher Schardt’s Nova was a fun interactive piece. Visitors would lie on the ground, looking upward of the shifting, changing screen affixed to the ceiling.
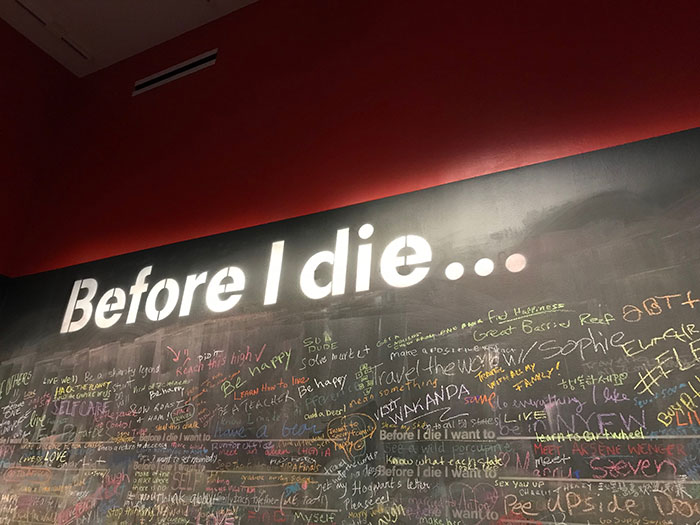
My favorite interactive piece was a chalkboard room by Candy Chang, Before I Die. Visitors wrote on the walls different thoughts about what they wanted to do before they died.
No Spectators: The Art of Burning Man was a beautiful exhibit. Yet again, I enjoyed the installations that sprawled across the galleries of the Renwick.