How to Keep a Sketchbook

Sketch by Megan Coyle

Sketchbooks are a wonderful way to practice your craft as an artist. You can use them to plan out future compositions, as a visual daily journal, to practice (so you can improve drawing various subjects), or for one of the many other reasons artist keep sketchbooks.

If you’ve decided to start keeping a sketchbook of your own, here’s what you can do to get started:

1. Get your supplies

Head over to your local arts and craft store to pick up a sketchbook and drawing materials. You may want to use regular graphite or something like color pencils, oil pastels, or water colors.

2. Figure out your sketchbook’s purpose

Do you want it to be a free-form daily journal, or a book of potential ideas? Should it be used to practice drawing? Or will you use it to produce mini, original works of art? Figuring out the sketchbook’s purpose will help keep it focused.

3. Pick a schedule and stick to it

This will help you ensure that you consistently use the sketchbook. This also helps document how your work in the sketchbook changes over time.

4. Occasionally revisit previous entries

Taking the time to review your work every once in a while, helps you evaluate what you’ve previously done, and make a mental note of the direction you’d like to move in.

And there you have it – a list of steps to get you started with a sketchbook. Good luck and happy creating!

How to Stay Organized as an Artist

Yellow Flowers is a collage by Megan Coyle

It’s easy to be unorganized as an artist, especially when the materials you use for your craft keep piling up over the years as you collect or save various tools. It’s also easy to lose track of your artwork, or allow all your promotional materials and original art to clutter up your studio. Instead of letting your studio get in complete disarray, here are a few tips to keep your creative life organized:

1. Use organizers for your materials

There are all sorts of plastic drawers you can use for organizing drawing tools, scraps of paper, paint, clay, and more. Organizers will help keep your tools and materials in order, so they don’t end up scattered around your studio or home.

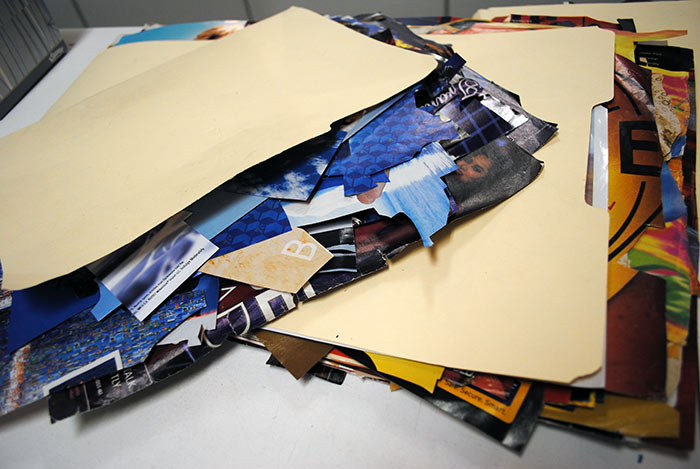
2. Use portfolios for 2d work

Portfolios can help organize your flat or 2d artwork, and can also serve as an excellent way to transport your artwork to other places like galleries or studios.

3. Keep track of your art inventory with a spreadsheet

Over the years, it’s far too easy to lose track of the artwork you’ve made and where it is. Creating a spreadsheet inventory, can help you keep track of where everything is. It helps to keep a thumbnail of every work of art in the spreadsheet, along with the date of creation, dimensions, location (at your home, in an exhibit, or sold to a client), client info and date sold (if applicable), exhibits/publications it’s appeared in, and if you have any additional notes on a specific work of art. Then you can keep your inventory updated whenever you create new artwork or sell and exhibit existing art.

4. Create a filing system for your marketing materials

On your computer, keep a folder filled with marketing materials that you use to promote your artwork, such as your artist resume, biography, artist statement, and any digital files of postcards or other mailers you’ve used to promote your work. By having everything maintained in one place, you can easily find your art-related materials whenever you need to promote upcoming shows. You can also throw out outdated, printed marketing materials that are no longer relevant, especially when it’s easy enough for you to print out a new, updated copy.

5. Keep a calendar dedicated to your art-related activities

Maintain a calendar that has all the dates related to your exhibits, gallery application deadlines, and art-making schedule.

6. Stick to a schedule

By sticking to a schedule for when you make artwork, and when you plan to take a couple of days off from it, is important to ensure that you are consistently making artwork and working on your craft.

7. Designate a space

If you have a studio, that should be your dedicated space for your artwork. Try not to let your artwork and materials clutter your home or non-studio spaces. If you don’t have a dedicated studio, dedicate a specific section of your home to your art-making. By defining your art space, you can constrain the materials and art to that one space, and you don’t have to declutter it from other sections of your home.

8. Get rid of what you don’t need

If you haven’t used something in a couple of years, chances are you won’t end up using it any time soon. Remove the excess by tossing out, recycling, or donating anything you haven’t used in a while. By simplifying your workspace, it’ll be a lot easier to stay organized.


Staying organized makes any job a lot easier. Instead of sifting through piles of marketing or art materials, having a proper filing system can make it easier to locate what you need when you need it. By keeping your creative space more organized, you’ll have an easier time running your art business.

How to Create a Portfolio

Portrait of a Horse by collage artist Megan Coyle

If you want to start exhibiting or selling your artwork, it’s important that you build out a portfolio so people can sample the work you’ve done, or see the work you’re capable of doing. Review the artwork you’ve made thus far, and select the strongest pieces. How do they compare when they’re grouped together? See if you can meet these requirements to ensure that you have a good portfolio:

  • Is there enough variation?
  • Do they show that you have range?
  • Are they consistent?
  • Is each piece memorable in its own way?
  • Do you have at least 10 pieces?

If you weren’t able to meet all the requirements, or if there were any pieces you weren’t thrilled with, you can make more art so you can fill in any of the gaps. Your portfolio should be a body of work that you’re proud of, so you should replace anything that you’re not crazy about with newer, better art.

If you’re compiling a portfolio to apply for an exhibit:

  1. Make sure the artwork speaks to the gallery – meaning do the research on what they’ve exhibited previously, and if your art looks like something they’d show there.
  2. Make sure it fits the requirements.
  3. Organize the art in such a way that it flows nicely – that each piece can call attention to itself and that there’s a good balance of color.
  4. Have someone look over the portfolio and provide feedback. Often times it’s easy to stare too long at our work and get to a point where it’s difficult to curate or edit the pieces.
  5. Provide supplementary information with your portfolio, like an artist bio, artist statement, resume, and any good articles that have been written about your work.

When it comes to pulling together a portfolio when you want to sell your artwork, you’ll want to use it to mainly market your work:

  1. Make sure the portfolio has a good sample of the work you want to sell
  2. Have someone take a look at the art you selected and provide feedback. Does the work make them want to see more?
  3. Come up with a strategy for how you’d like to market your art from your portfolio. How will you share the images?
  4. Have an online store where you can direct users to.

As an artist, you’re never done building your portfolio. You will constantly review the new work you’ve made and update your portfolio when needed to keep it current.

How to Give an Artist Talk

Megan Coyle giving an artist talk

It’s important for artists to know how to talk about their artwork so they can promote it to the public. Giving talks helps others understand your process, technique, and the underlying meaning behind your work. If you have to give an artist talk, but are a little stuck on how to get started, here are some ideas to help you out:

1. Brainstorm

Take some time to brainstorm possible topics to cover. What sets your work apart from other artists? How does your artwork fit in with what’s currently available on the market? What projects are you most proud of? Or what projects or series are you hoping to complete in the future?

2. Write a rough draft of your talk

I generally like to create an outline first of what I want to talk about, and then I expand on the details later. I like to use the following format:

  • Brief overview of my background and studies
  • How I got started with being an artist
  • Who are my influences
  • A walkthrough of my process and technique
  • More details on the subject matter I cover
  • A look at the meaning behind some of my work
  • My plans for future projects or series to work on
  • Closing remarks

3. Expand on the topics in your rough draft

Think about the narrative you can write for each topic. What stories can you tell? Sharing anecdotes can help make your talk more engaging for listeners.

4. Rehearse your talk

I usually like to over-rehearse my talks, just to know for sure that I know everything I want to say by heart, and so I won’t stumble over my words. I’d recommend practicing in front of a mirror, as well as practicing while staring across the room, so you can have a couple of different ways of experiencing the artist talk delivery process.

5. Brainstorm other topics when talking to individuals after the talk

Think about talking points about your work that you don’t cover in your talk, that you can use when chatting with people in the crowd.


So there you have it – a few ideas to help get you started. And feel free to let me know if you have any questions. I’m always looking to improve on the resources I’m writing.

How to Make a Paper Collage

Pretty as a Peacock by collage artist Megan Coyle

Pretty as a Peacock by collage artist Megan Coyle

Collage is a medium that involves layers – usually layers of paper, magazine cutouts, or photographs – although there are artists who make collages with other found materials. If you’re new to making collages, paper collages are a great place to start since the materials are relatively easy to find, and the medium is so flexible. You can easily add layers of paper as well as peel back previous layers, which is especially useful if you want to “undo” any of your work during the process.

Here’s how you can get started:

1. Decide what you want to collage

Figure out if you want to make an abstract or representational collage, and think about what color palette you’d like to use. Do you want to make more of a traditional collage, or do you want to paint with paper?

2. Find your inspiration

If you’re using reference photos, collect photographs you’ve taken to help guide your work.

3. Gather your materials

If you’re working with found paper, take some time to find a variety of paper you can use. Or sift through magazines and photographs to find possible imagery to use. Sort the paper based on color and texture to make it easier to assemble your collage. You should also find:

  • Glue
  • Varnish
  • Scissors
  • Pencil and eraser
  • Paper (or the support you want to collage on, let that be canvas, panel, etc)

4. Plan your collage

With pencil, sketch out an idea of what the composition will look like on your support. If it’s going to be more of an abstract collage, plan out the general look and feel you’re going for. You can plan as little or as much as you need to.

Pretty as a Peacock sketch by collage artist Megan Coyle

5. Start collaging

With scissors, cut the paper into different shapes and fragments. You can arrange the pieces of paper on the page before gluing them down, or you can cut out shapes and glue them as you move along. Layer the paper where needed, and peel back layers when needed. To make the collage process more flexible, use an acid free glue stick. Glue sticks are a much less permanent glue, which makes the process more flexible since it’s easier to peel back previous layers.

Pretty as a Peacock work in progress by collage artist Megan Coyle

6. Varnish your collage

Since paper collage is made up of paper, it’s a very delicate medium. Varnishing your collage will help seal in the pieces so they don’t easily fall apart. UV protective varnishes will also protect the paper from light.

Pretty as a Peacock by collage artist Megan Coyle

7. Frame your collage

Once your work of art is complete and the varnish has dried, you should frame your new collage to help protect it even more. Use acid-free matting and UV-protective glass. Since custom framing can be pricy, consider making your artwork with dimensions that fit standard sized frames.

Now you’re ready to share your artwork with the world!

How to Handle Criticism as an Artist

If you’re an artist or an aspiring artist, you’ll eventually find yourself getting faced with criticism. Some of the criticism will be constructive, while other times it will be too general to be useful. Criticism can sting, but it’s important to learn how to filter through the feedback you get so you don’t get too discouraged – and so you can improve in the areas that really matter.

I’ll admit that when I first started promoting my artwork online and exhibiting in galleries, any bit of criticism was pretty painful. It took years to learn how to filter through those comments so I could focus on what could improve my craft as an artist, instead of being crippled by any outside negativity. The reality is that as an artist, not everyone will enjoy your work. So you should focus more on the people who do enjoy your work, and how you can help them like it even more.

Here are some tips on how to handle criticism of your artwork:

1. Take note of the critique and push it aside.

This helps give you some distance from the criticism, and makes it easier to not take it personally so you can approach it with more of an analytical mindset. Being an artist is a personal experience. You put yourself into your work, and when it gets picked apart, it’s hard not to take it personally. So the first time you hear a critique, spend some time away from the comment. Then later, with a clear mind, revisit the feedback you received and see how it can be used to improve your craft.

2. Analyze what was said and figure out what was useful

Did the critic make a general statement without referencing anything specific? If so, no need to mull over their words since it won’t help you constructively.

3. Keep a file of any compliments or words of encouragement about your work.

It’s useful to look over this any time you get discouraging criticism, to serve as a reminder that other people do in fact enjoy your work.

4. Remind yourself why you’re an artist and keep creating.

It’s important to take every piece criticism with a grain of salt, so you don’t get too frustrated with your work. With art, it’s all too easy for others to be opinionated critics. Art is really subjective after all, and it’s important that you remind yourself what you love about your own work, so you can keep moving forward by growing in a direction that truly matters to you.

How to “Paint with Paper”

Commuters is a collage by Megan Coyle

I call the collage technique I use, “painting with paper,” because I manipulate magazine strips in such a way that they mimic the brushstrokes in a painting. By focusing on color and texture, I cut magazine pages into various shapes that make up the shadows and highlights of different compositions.

If you’re interested in making your own “painting with paper” collage, here are the steps you can follow:

1. Gather your materials

You’ll need:

  • a stack of magazines
  • watercolor paper or some sort of material to make your collage on
  • pencil and eraser
  • scissors
  • acid-free glue stick (this makes it easier to make adjustments to your collage when it’s still a work in progress)
  • UV-protective varnish

Materials that Megan Coyle uses for her collages

2. Pick a composition

Figure out what you want to collage. I like to take photos when I travel, which I later use as reference images for my artwork. I typically like to use animals, still life, landscapes, and people as the subjects for my art.

3. Sketch our your composition

On the support you’re using, sketch out your composition so you have a plan for the direction of your collage. The detail of the sketch may depend on the composition – for example, it may be simpler for minimalist landscape compositions, or more detailed when capturing the likeness of someone for a portrait.

Sketch of Commuters by collage artist Megan Coyle

4. Select colors and patterns

Page through the stack of magazines and tear out pages that have colors and patterns you’d like to incorporate into your collage. Sometimes I like to sort the magazine pages by color to make it easier when it comes to piecing together the collage.

Materials that Megan Coyle uses for her collages

5. Cut and paste shapes from the magazine pages

Cut out different shapes from the magazine pages based on the different shapes of shadows and highlights that compose your composition. Paste them on top of your sketch. You may want to cut several shapes before you start pasting, or paste the shapes down as you go.

Work in Progress of Commuters by collage artist Megan Coyle

6. Keep piecing it together

Add as many layers as you need in order to have the collage looking the way you want it to look. What’s great about collage, is that you can easily peel back previous layers if they aren’t working for you. You can also add layers to different sections.

Commuters by collage artist Megan Coyle

7. Varnish your collage

Once your collage is complete, varnish it with a UV-protective varnish so all the magazine strips stay in place. This will also help protect the paper from sunlight. Paper is a delicate material, and you’ll want to take as many steps as possible to protect your artwork.

8. Frame your collage

I’d recommend framing your collage with UV-protective glass as well.


And there you have it – the steps for making your own “painting with paper” collage. Feel free to leave a comment below if you have any questions or need some clarification on the process.

How to Develop a Creative Support Network

"One, Two, Three Giraffes" by collage artist Megan Coyle

Criticism and hard work come with the territory of being an artist. And in order to move past all that criticism, and make all that hard work not seem like work, it’s good to have a strong support network in place for yourself. A support network can help you achieve your creative goals by being a source of motivation and encouragement.

Here’s how you can build your own creative network:

1. Ask for Help

Reach out to local artists you admire for advice. Who knows, maybe you’ll build a few friendships out of those connections, and artistic friendships are powerful.

2. Surround Yourself With Your Champions

Spend more time around people who encourage you. Spend less time or avoid the naysayers. You want to surround yourself with people who lift you up and challenge you in good ways, while distancing yourself from those who discourage or put down your work.

3. Give Back to the Community

Volunteer your time as a creative – let that be by visiting schools or organizations to talk about your technique and process, or by offering career advice to aspiring artists. Giving more than you get is a great way to not only grow as an artist, but as a person.

4. Network

Get to know other artists and art enthusiasts in the community by attending local art openings and exhibits. You can also meet other artists or aspiring artists by taking art classes or attending creative meetups.


A strong network can serve as a great resource for helping you shape your art career. It can also encourage you when you’re feeling discouraged or overwhelmed. It’s always helpful to know that you’re not alone with the struggles and joys of living the creative life, and hearing other artists share stories about their experiences can help you feel relieved about the direction you’re headed with your work. And best of all, a network can inspire you – meeting wonderful people who do their own exciting work, can motivate you to challenge yourself in new ways.

How to Become an Artist

"The Daydreaming Fish" by collage artist Megan Coyle

I often hear from art students and other aspiring artists who ask me for tips on how they can become an artist. I thought I’d share some advice on how someone can get started if they want to become an artist:

1. Start making art

You have to start somewhere, and the first step to becoming an artist is to start making art. Put your frustrations and negative thoughts aside and focus on putting the practice in. Watch YouTube videos of techniques that other artists are using, and try to use these techniques on your own. Practice sketching famous works of art, then start drawing from pictures you’ve taken or draw from real life.

2. Take classes

Take an art class to help encourage and motivate your work. Classes can help you get a better foundation in areas where you might be shaky, and with practice, comes confidence. They are also a great way to get advice and feedback from more experienced artists.

3. Evaluate your work and ask others to critique it

Every now and then, set your artwork aside and don’t look at it for a little while. Then return to it so you can evaluate your work with fresh eyes. Make note of what you think really works for the piece and what areas need improvement. Continue working on improving the work, or start over with a new work of art and keep what areas of improvement you need in mind. If you’re not sure how to improve a specific work of art, ask for others to help you out by critiquing your art. Ask them how you can improve your work and what they currently like about it. As an artist, it’s important to constantly improve and refine your craft.

4. Make time for your art

It’s a good idea to map out a schedule for making art, so you can constantly work on practicing your craft. It’s difficult to get better at something if you aren’t actually practicing it. For some more advice on this, checkout 7 Ways to Make Time for Your Artwork.

5. Build a portfolio

A crucial piece to promoting your work as an artist, is to build a strong portfolio. As you make art, take pictures of every finished piece. Then start sifting through the images and select your best pieces that also reflect the variety of work you can produce. You don’t want every piece in your portfolio looking too similar, but you also want to make sure that each piece reflects your strength as an artist.

6. Find a marketing strategy

One way that you can promote your artwork is by looking into local art centers and organizations that hold exhibitions, and start submitting your work to exhibits. Also figure out what ways you want to promote your work online – put together an online portfolio website and pick the social media platforms you’d prefer to use to post images of your work and share them with the world.

7. Connect with other artists

As you work on developing your craft and spreading the word of your art, it’s also important to connect with other artists you admire as well as more experienced artists in your local arts community. Seek out other artists who you can ask for advice.

8. Never give up

One of the biggest parts to being an artist is being persistent, and never giving up. If one technique doesn’t seem to work for you, try focusing on something else for a little while before returning to it. Being persistent and pivoting when necessary, is an essential part to being an artist.


Becoming an artist is journey that takes time and a lot of trial and error. I’m constantly trying to find ways to improve my artwork and the way I promote it. Some of the things I’ve tried have failed miserably, while other things have unexpectedly worked. You’ll never know for sure what can work for you until you start trying.

How to Build a Wall of Positivity for Your Creative Self

As a creative, it’s easy for my confidence and self-esteem to take a hit from time to time. I am putting myself out there as an artist, which means it’s easier for my work to get rejected and criticized. And although I can get better at dealing with rejection when it comes to my work, that doesn’t mean it won’t sting from time to time.

In an ideal world, I’m sure all artists would love to have every piece they’ve made to be thought of as perfect and beautiful to every viewer. The truth is, not everything we make will be great and not everyone will like our work. But that’s part of the beauty of being an artist – the exploration of our work and process. It’s a fantastic journey where we experiment with making things. Some of those experiments won’t turn out well, while others will make us stand back in disbelief that somehow we made something that came together just right.

But for those days when I’ve felt discouraged and frustrated with my work, I realized I needed to find a way to remind myself that I am capable of doing good work. So today I decided to do an exercise. I decided to build a “wall of positivity,” and I thought I’d share it so that it can help anyone else out there who needs a little bit of a creative confidence boost.

  1. I took a stack of three different color sticky notes. One color would be used to focus on my achievements as an artist, another would highlight my skills, and the last would focus on my personality traits.
  2. I wrote down a different achievement or positive way to describe myself on separate sticky notes.
  3. As I wrote down a thought, I took the sticky note and stuck it to a blank wall.
  4. I kept writing down thoughts until I had a few rows of notes on the wall.
  5. I took a step back and stared at the notes for a little bit. It’s difficult to feel discouraged with your work when you have a wall of positivity staring back at you.

I think it’s important for artists to find creative ways to remind themselves why they’re doing what they’re doing. It’s good to recognize your successes no matter how small, so you don’t forget the great things you’ve accomplished and where they can lead you next.